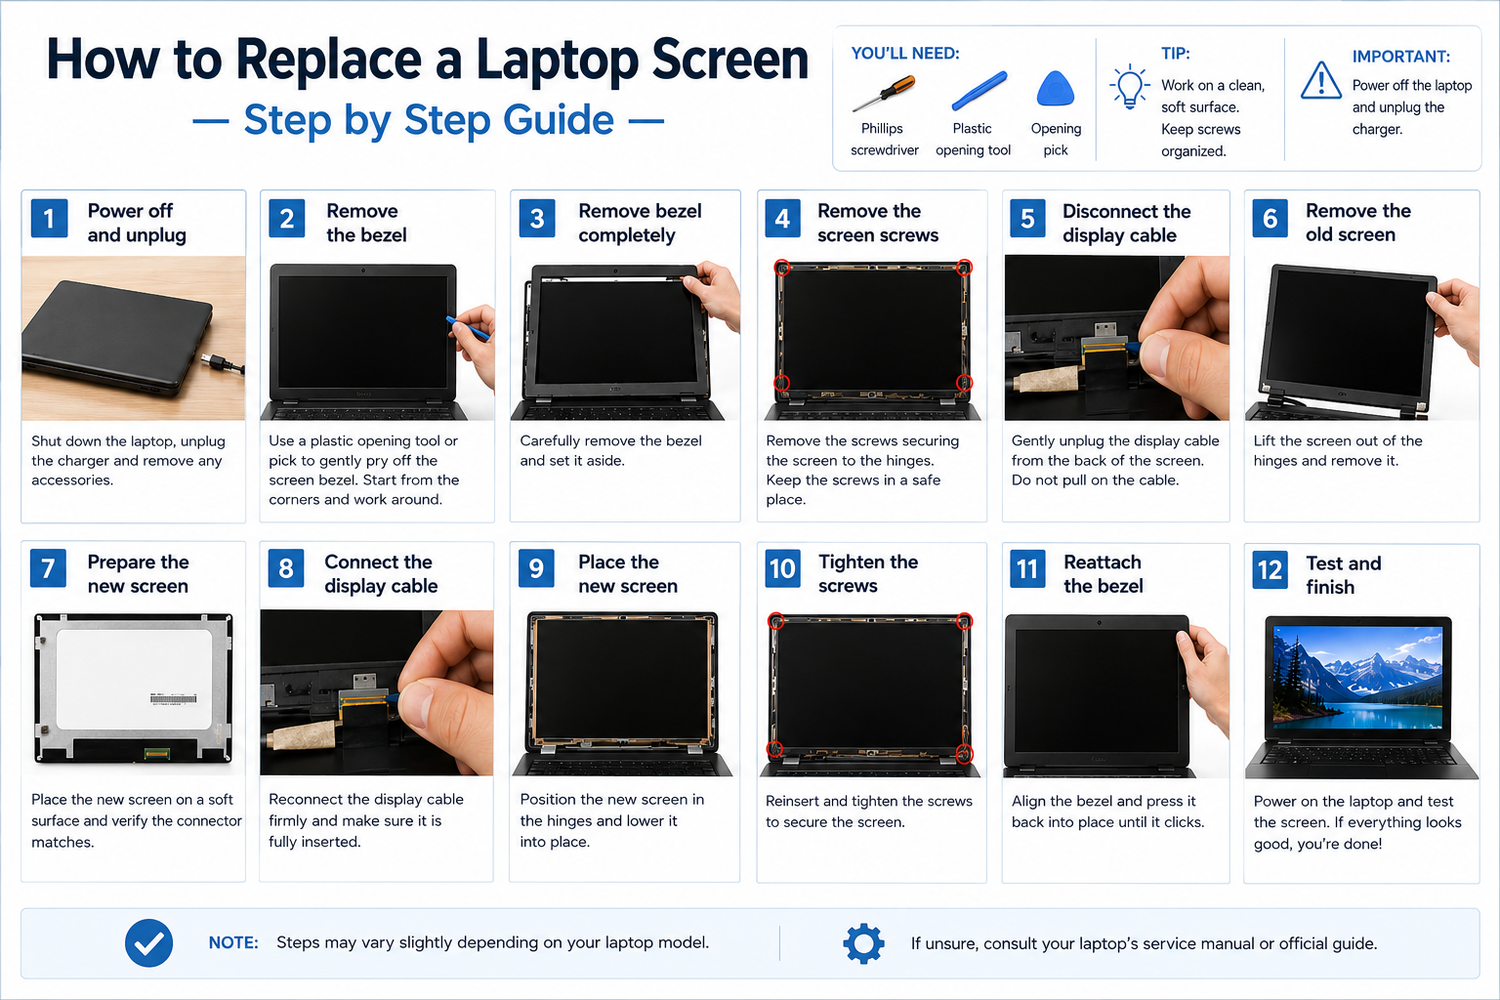
How to Replace a Laptop Screen — Step by Step Guide
A cracked, flickering or dead laptop screen doesn't mean your laptop is finished. In most cases, replacing a laptop screen is a straightforward repair that can save you hundreds of pounds compared to buying a new machine. This guide walks you through the entire process from start to finish.
What You'll Need
- A replacement laptop screen (matching your exact part number)
- A small Phillips head screwdriver
- A plastic pry tool or spudger
- A clean, flat workspace
- Optional: magnetic parts tray to keep screws safe
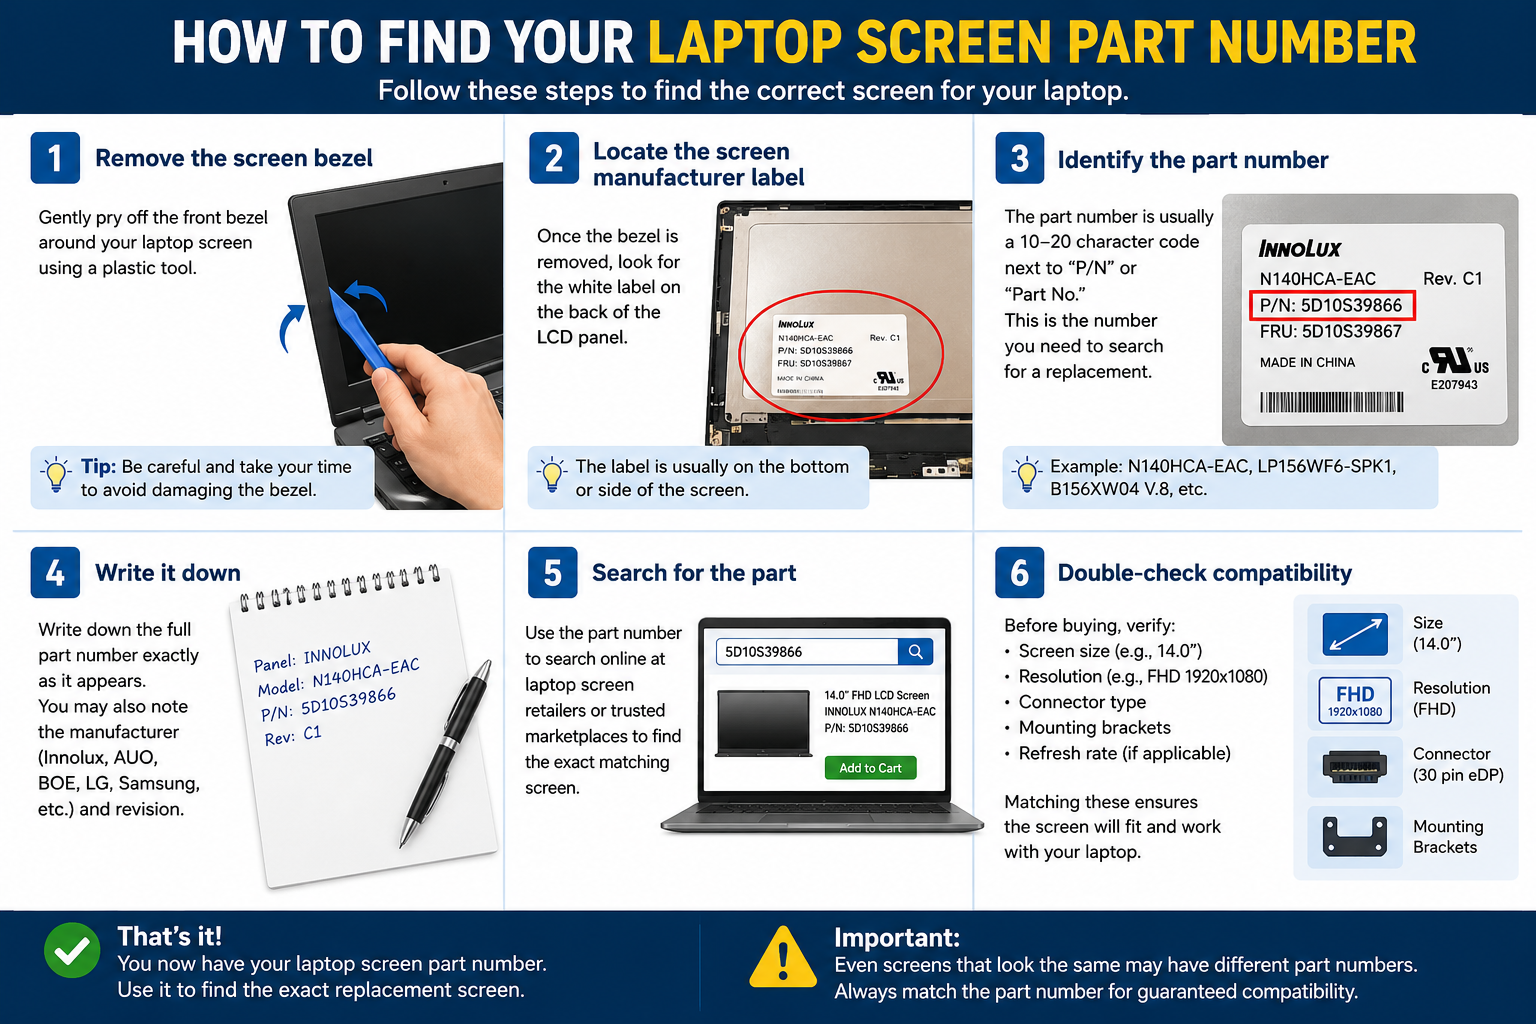
Step 1 — Find Your Laptop Screen Part Number
Before ordering a replacement, you need to identify the exact screen model. The part number is printed on a sticker on the back of your existing screen panel. To find it:
- Power off your laptop completely and unplug it
- Carefully peel back the rubber screw covers around the screen bezel
- Remove the screws and gently pop off the plastic bezel
- Look for a white sticker on the back of the screen — it will show a part number like B156HAN02.0, NE170QDM-NZ1, or similar
Step 2 — Order the Correct Replacement Screen
When ordering your replacement screen, make sure the following match your original panel:
- Screen size (e.g. 15.6", 17.0", 14.0")
- Resolution (e.g. FHD 1920x1080, QHD 2560x1440)
- Connector type and pin count (e.g. 30 pin, 40 pin eDP)
- Surface finish (matte or glossy)
- Refresh rate (60Hz, 120Hz, 144Hz, 240Hz)
- Touch or non-touch
Step 3 — Prepare Your Laptop
- Power off the laptop and disconnect the charger
- If possible, remove the battery
- Place the laptop on a clean, flat surface
- Work in a well-lit area
Step 4 — Remove the Old Screen
- Use a plastic spudger to carefully peel off the rubber screw covers around the screen bezel
- Remove the screws (usually 4–6 screws) and keep them safe
- Starting from a corner, gently prise the plastic bezel away from the screen
- Once the bezel is off, you'll see the screen panel held by metal brackets
- Remove the bracket screws and carefully tilt the screen forward
- You'll see the video cable connector on the back of the screen — gently unplug it
Step 5 — Install the New Screen
- Take your new replacement screen out of its packaging carefully
- Connect the video cable to the new screen firmly
- Position the new screen into the brackets and refit the screws
- Before reassembling fully, power on the laptop to test the new screen
- If the image is good — power off again and refit the bezel
Step 6 — Test Your Repair
- Full image displayed with no lines, dead pixels or discolouration
- Brightness controls working
- Touchscreen responding (if applicable)
- No flickering at different brightness levels
Shop Replacement Laptop Screens
At TechnologyVS, we stock hundreds of Grade A brand new laptop replacement screens for all major brands. Browse our full range at technologyvs.co.uk


Leave a comment
This site is protected by hCaptcha and the hCaptcha Privacy Policy and Terms of Service apply.